

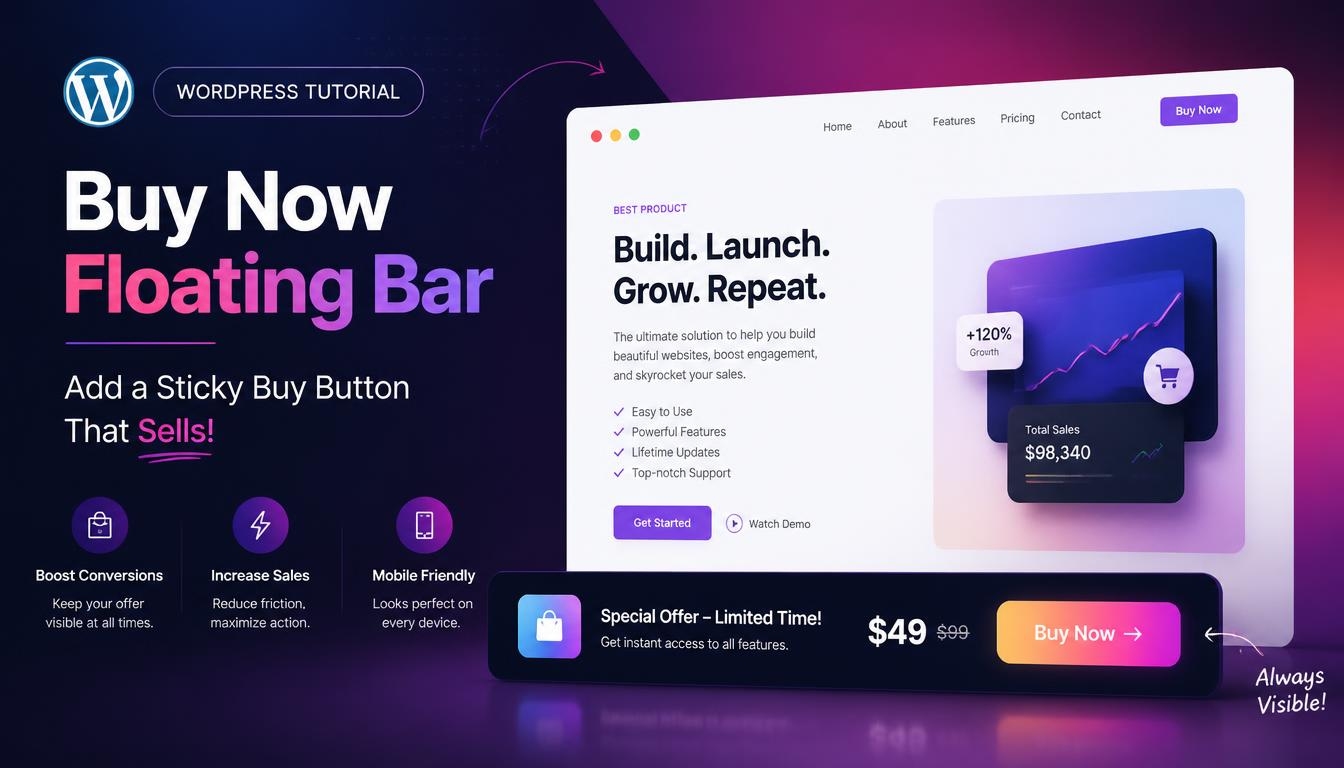
Your shopper has looked at the photos, read the description and scrolled through every review. They’re ready to buy, but the button is now three screens up. That’s where a buy now floating bar WordPress setup comes in. It’s a slim strip that stays on the screen while visitors scroll, keeping the product name, the price and a call-to-action button within reach the moment someone makes up their mind.
In this guide, I’ll show you how a buy now floating bar in WordPress works, why it matters and how it’s different from a notification bar or a floating menu. You’ll get the checks to run first, the plugins worth your time and four ways to add one: a plugin, FTP, a little CSS and HTML, or Elementor Pro. After that, we’ll cover the settings, speed tips and common mistakes that decide whether your bar actually earns clicks.
What Is a Buy Now Floating Bar in WordPress?
In plain words, a buy now floating bar in WordPress is a sticky element. It uses fixed positioning, so it stays in place while the rest of the page moves under it. You’ll usually see it at the bottom of the screen, though some stores put it at the top, just below the header.
On a WooCommerce product page, the bar normally appears after the shopper scrolls past the original add-to-cart button. It can show a small product thumbnail, the price, a quantity box and the button. On a blog post or a landing page, it’s often simpler: one floating button that goes to your checkout or sales page.
You can run a buy now floating bar WordPress setup across the whole site, or keep it to your product and sales pages. For most stores, the second option makes more sense, and the reason comes down to how people shop.
Why a Sticky Buy Button Helps Your Store
Product pages tend to get long. Photos, descriptions, size guides, reviews and shipping details all push the original button further up the page. The longer the page gets, the more scrolling stands between a shopper and the purchase. Some people will scroll back up. Some might not bother.
A buy now floating bar WordPress shoppers can see at all times takes that extra step away. It’s especially useful on mobile devices, where a small screen pushes key actions out of view after a couple of swipes.
I want to be honest about one thing. You’ll find big conversion rate numbers online, and many of them come without a source. Every store is different, so the numbers worth trusting are the ones you get from your own A/B testing.
Floating Bar vs. Notification Bar vs. Floating Menu
Before you pick a tool, it helps to know what you’re looking for, because these names get mixed up all the time. A notification bar, announcement bar or alert bar is a thin strip of sticky messaging for news, a sale or a discount. A floating menu helps with navigation, so visitors can quickly reach pages, contact links or social profiles. A buy now bar has a narrower purpose. It’s there to get the purchase done.
The table below shows the difference:
| Feature | Buy Now Floating Bar | Notification Bar | Floating Menu |
| Main job | Drive the purchase | Announce an offer or news | Help visitors navigate |
| Typical content | Product name, price, buy or add-to-cart button | Short message, link, countdown timer | Menu links, icons, social and contact links |
| Best place to use | Product pages, sales pages | Site-wide header or footer | Site-wide, side or bottom of the screen |
| Common trigger | After the original button scrolls out of view | On page load or on a schedule | Always visible or on scroll |
You don’t have to stick to one type of tool. When you plan a buy now floating bar in WordPress, a notification bar plugin can handle a sale message, and a floating button plugin can give you a clean sticky CTA.
What to Check Before You Add One
Now that you know which type of bar you want, a few quick checks will save you from overlap problems later.
Start with your theme. Some WooCommerce themes already come with a sticky add-to-cart option. Astra has one under Appearance > Customize > WooCommerce > Single Product, and Kadence includes it in its Pro add-on. See whether your theme has it, and whether it’s in the free or paid version. If it’s already there, you might not need a plugin, and you won’t want two bars showing at once.
Then look at your product types. A simple product is easy, since one click can add it to the cart. A variable product with sizes or colors is different, because the shopper has to choose an option first. Your bar should either show the variation choices or send the shopper back up to pick one.
Also check what else floats on your pages. A live chat widget, a cookie consent banner or a back-to-top button can end up sitting on top of your bar. Adjusting the spacing or the z-index value sorts that out.
Last, note your page builder. Elementor, Divi and the block editor each handle custom code in their own way, and some plugins only work with one builder. If you use Elementor Pro, it has its own sticky setting, which I’ll cover in the methods below.
Should You Use a Plugin or a Custom Build?
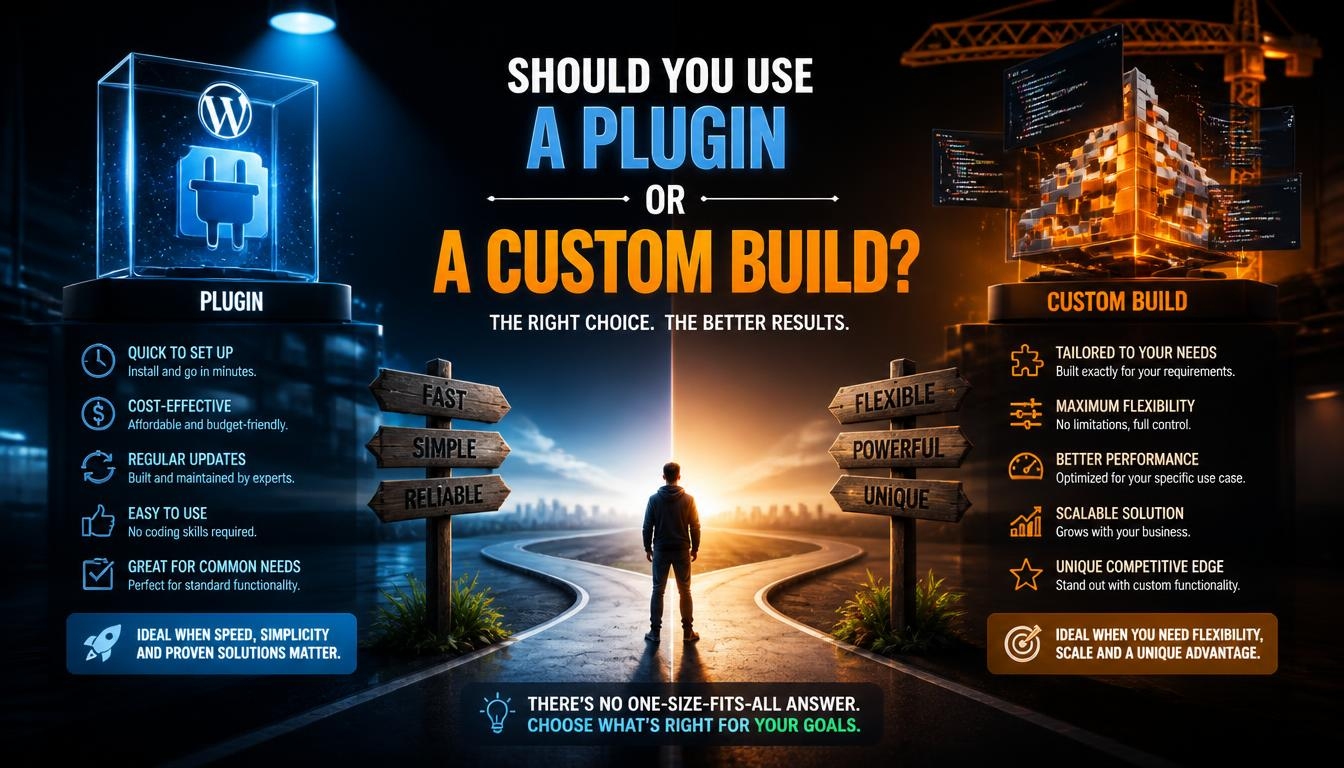
Your checks should tell you which route fits. For most stores, a plugin is the simplest way to run a buy now floating bar in WordPress. Setup is quick, updates come from the developer and you can change settings without touching code. A custom build is worth it when you need deep integrations with your own systems, special rules (such as showing different messages to returning visitors or based on stock levels) or the lightest possible code. If you go that route, the CSS and HTML method below gives you or a developer a good starting point.
Best Plugins for Floating Bars and Buttons
If a plugin sounds right for you, these cover most needs, from simple promo strips to sticky buttons and full floating menus. Prices change, so check each official plugin page before you pick a buy now floating bar WordPress tool.
| Plugin | Type | Best For | Standout Features | Free or Paid |
| OptinMonster | Conversion toolkit | Promo bars with smart targeting | Top or bottom floating bars, exit intent, scroll triggers, A/B testing | Paid |
| Hello Bar | Notification bar | Quick bars and popups | Bars and popups, basic targeting, free plan with view limits | Limited free plan + paid |
| HashBar | Notification bar | Offers and announcements | Unlimited bars, popup campaigns, countdown timers | Free + Pro |
| Easy Notification Bar | Notification bar | Beginners | Top bar message with an optional button, live Customizer settings | Free |
| WPFront Notification Bar | Notification bar | Basic custom bars | Message with a button, top or bottom position, schedules; Pro adds multiple bars | Free + Pro |
| Sticky Buttons | Floating buttons | Several CTA buttons at once | Floating buttons, referrer-based display; Pro adds modal windows and ScrollSpy | Free + Pro |
| Super Floating & Flying Menu | Floating menu | Navigation plus CTAs | 100+ ready-made menus, circular fans, side panels, Elementor-built panels | Premium |
If you need a bar made for product pages, search the repository for WooCommerce “sticky add to cart” plugins. They’re built around the add-to-cart button, unlike general notification bars. With your tool picked, it’s time to set it up.
How to Add a Buy Now Floating Bar in WordPress
You have four options here. Choose based on the tool you picked, how comfortable you are and what your host allows.
Method 1: Install a Plugin From the Dashboard
For most people, this is the fastest way to get a buy now floating bar in WordPress running. In your WordPress dashboard, go to Plugins > Add Plugin (older versions label it “Add New Plugin”). Search the plugin repository for the plugin you chose, or try terms like “sticky add to cart,” “floating bar” or “floating button.” Check the ratings and the last update date, then click Install Now and Activate.
Open the plugin settings and set the position, the scroll trigger, the pages it should appear on, the button text and the colors. Last, open a real product page on your phone and your computer to see how it looks.
Method 2: Upload a Plugin Through FTP
Sometimes you can’t upload through the dashboard. You may have a premium plugin in a ZIP file, or your host may restrict uploads. This is where FTP helps.
Take a full backup of your site first, so you have something to fall back on. Connect to your server with an FTP client such as FileZilla, unzip the plugin on your computer and upload the plugin folder into /wp-content/plugins/. WordPress recommends file permissions of 755 for folders and 644 for files. After the upload, go back to the dashboard and activate the plugin.
Method 3: Add a Floating Button With CSS and HTML
If you’d like a buy now floating bar in WordPress without installing a plugin, a short piece of code can do the job. It also keeps your site lighter.
Start with the HTML. You can paste it into a Custom HTML block on one page, add it to the footer with a code snippets plugin, or, if you use Divi, put it in the body box under Divi Theme Options > Integration.
<a href=”https://yourstore.com/checkout/?add-to-cart=123″ class=”floating-buy-btn”>Buy Now</a>
Replace the link with your own checkout URL. In WooCommerce, adding ?add-to-cart= and the product ID to the end of a store link puts that product in the cart. This works for simple products. For a variable product, the link also needs the variation ID.
Now add the CSS. With a classic theme, use Appearance > Customize > Additional CSS. With a block theme, go to Appearance > Editor, open Styles, click the three-dot menu and select Additional CSS.
.floating-buy-btn {
position: fixed;
bottom: 20px;
right: 20px;
z-index: 9999;
background: #c1121f;
color: #ffffff;
padding: 14px 28px;
border-radius: 50px;
font-weight: 700;
text-decoration: none;
box-shadow: 0 4px 12px rgba(0, 0, 0, 0.2);
}
@media (max-width: 767px) {
.floating-buy-btn {
left: 16px;
right: 16px;
bottom: 16px;
text-align: center;
}
}
The z-index keeps the button above other elements. The media query stretches it across the screen on phones, so it’s easier to tap. The red background with white text also meets the 4.5:1 contrast minimum. If you only want the button on one page, put both the HTML and the CSS in a Custom HTML block on that page.
Method 4: Use Elementor Pro’s Sticky Setting
If your site is built with Elementor Pro, you can make a buy section stick without extra code. In the Elementor editor, build your button, or a small container with the product name, price and button. Select it, open the Advanced tab and expand Motion Effects. Set Sticky to Bottom (or Top), then use Sticky On to choose whether it sticks on desktop, tablet, mobile or all three. Give the container a higher z-index so it stays above other sections. Keep in mind that this sticky option is part of Elementor Pro, not the free version.
Settings That Make Your Bar Convert
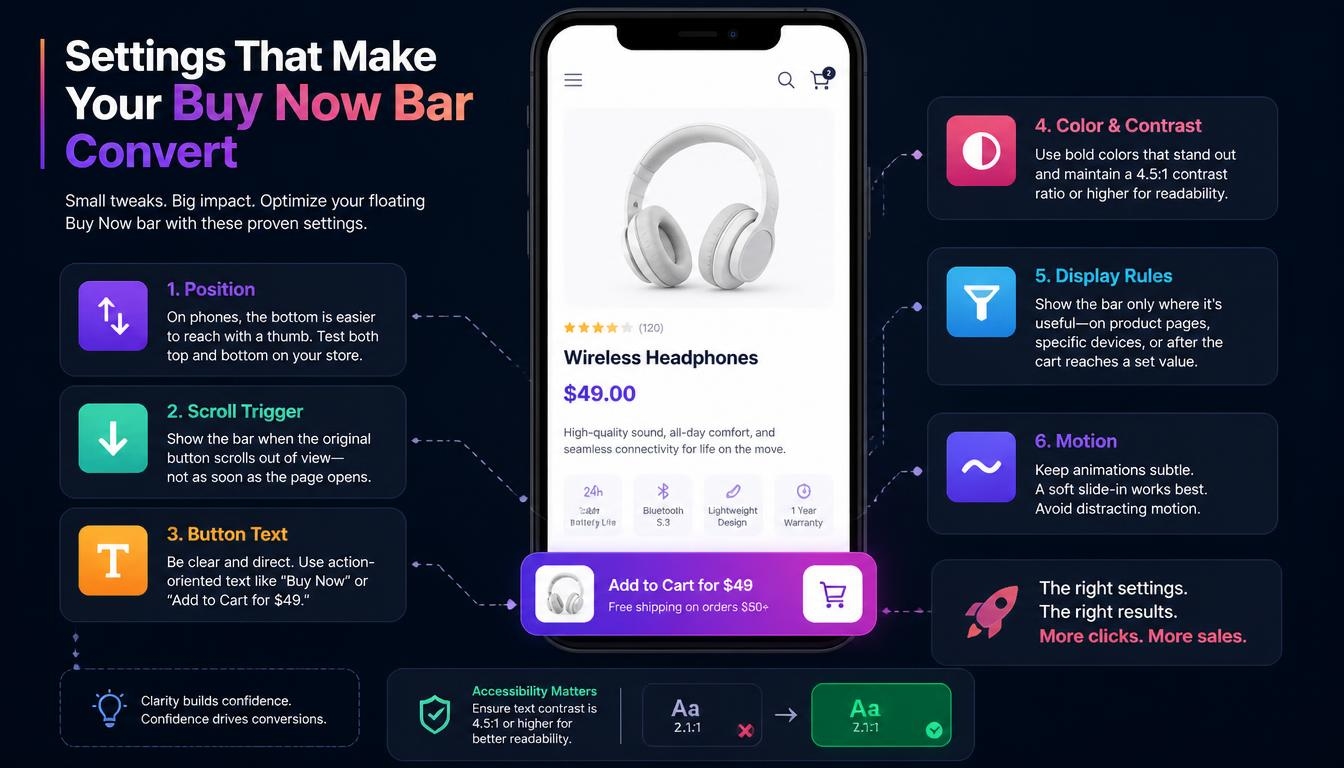
Whichever method you used, installing the bar is the easy part. The settings decide whether your buy now floating bar in WordPress makes a difference or gets ignored. These are the ones I’d look at first:
- Position: On phones, the bottom of the screen can be easier to reach with a thumb. Try both top and bottom on your own store.
- Scroll trigger: Let the bar appear when the original button scrolls out of view. Showing it as soon as the page opens just adds clutter.
- Button text: Tell shoppers exactly what happens when they tap. “Buy Now” and “Add to Cart” are clear and direct. You can even add the price, as in “Add to Cart for $49.” A vague label like “Submit” or “Click Here” leaves people guessing, and a shopper who has to guess may not tap at all.
- Color and contrast: Choose a bold color that stands apart from the page, and keep the text contrast at 4.5:1 or higher, which is the accessibility standard for normal text.
- Display rules: Show the bar only where it’s useful, such as on product pages, on certain devices or after the cart reaches a set value.
- Motion: A soft slide-in is enough. Avoid auto-playing animations that pull attention away from the product.
Keep It Fast, Mobile-Friendly and Accessible
Good settings won’t help much if the bar slows your page down. A bar that makes things jump around while loading isn’t doing you any favors either. Animate it with CSS transforms rather than changing its height or position, load its scripts only on the pages that use it and defer JavaScript where possible. All of this helps your Cumulative Layout Shift score, and Google treats 0.1 or less as good.
For SEO, a slim bar is a much safer choice than a full-screen popup. Google’s guidance allows banners that use a reasonable amount of screen space and are easy to dismiss, while intrusive interstitials that cover the main content can count against a page on mobile. Keep your buy now floating bar WordPress design small and easy to close, and you stay on the right side of that guidance. It’s also wise not to run two bar plugins together, since they can conflict.
Accessibility matters too. WCAG 2.2 asks for touch targets of at least 24 by 24 CSS pixels, and Apple recommends 44 by 44 points for comfortable tapping. The button should also work with a keyboard, show a clear focus outline and have a close button if the bar covers any content.
How to Measure Whether It’s Working
After your buy now floating bar in WordPress goes live, keep an eye on how it performs. Set up a click event in Google Analytics 4, either through Google Tag Manager or your plugin’s own tracking, and follow these numbers:
- Click-through rate of the floating button
- Add-to-cart rate on pages that show the bar
- Conversion rate before and after adding the bar
- Revenue per visitor, to see whether clicks turn into sales
- Bounce rate, to make sure the bar isn’t pushing people away
Change one thing at a time, such as the text, the color or the position. That way, you’ll know which change made the difference.
Common Mistakes to Avoid
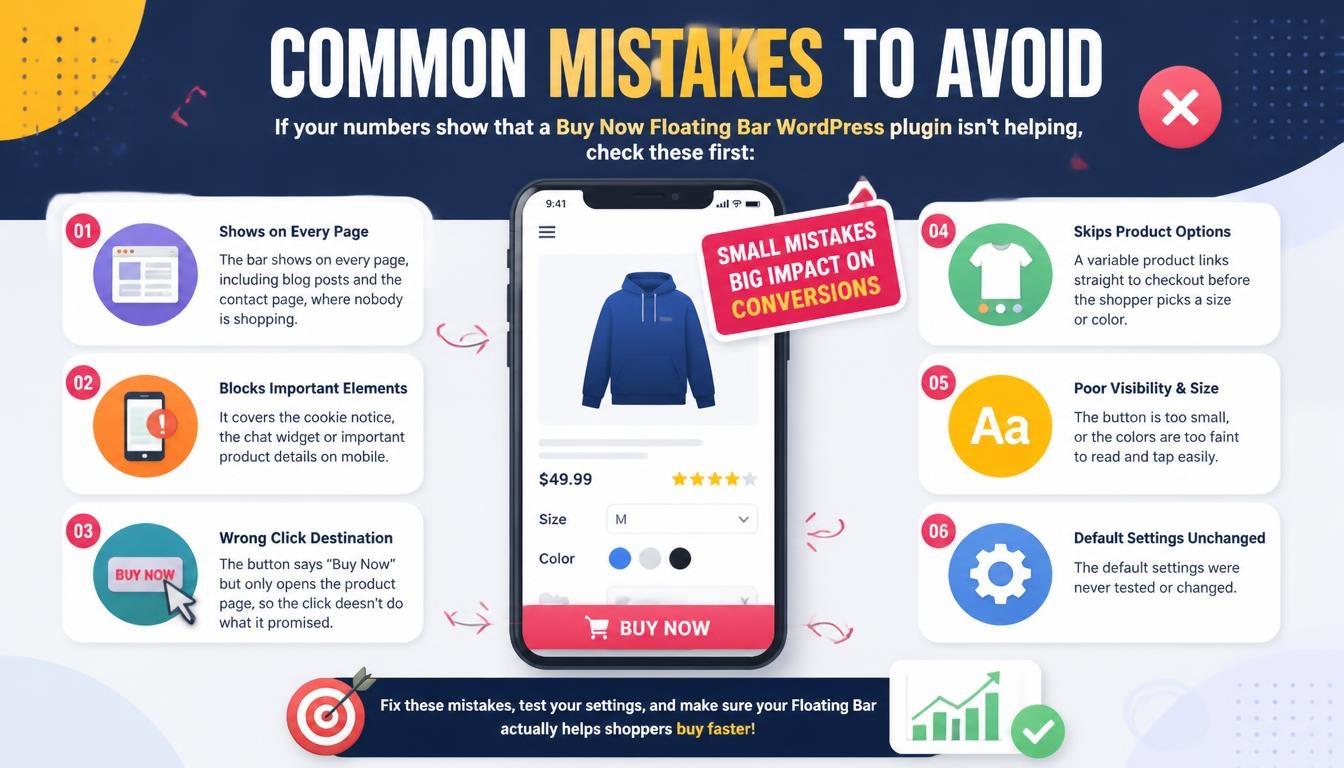
If your numbers show that a buy now floating bar WordPress plugin isn’t helping, check these first:
- The bar shows on every page, including blog posts and the contact page, where nobody is shopping
- It covers the cookie notice, the chat widget or important product details on mobile
- The button says “Buy Now” but only opens the product page, so the click doesn’t do what it promised
- A variable product links straight to checkout before the shopper picks a size or color
- The button is too small, or the colors are too faint to read and tap easily
- The default settings were never tested or changed
FAQs
How long does it take to add a buy now floating bar in WordPress?
With a plugin from the dashboard, it’s usually a matter of minutes. FTP takes longer because you upload the files yourself. With the code method or Elementor Pro, it depends on how comfortable you are with those tools.
Will a floating bar slow down my site or hurt SEO?
A lightweight, well-built buy now floating bar in WordPress adds very little load time. It only takes up a small part of the screen, so it’s far less risky for SEO than a popup that covers the whole page.
Should the bar go at the top or bottom of the screen?
There’s no single right answer. Bottom placement is a popular choice for mobile stores, while some sites prefer the top so the bar sits near the header. Test both with real visitors and keep the one that performs better.
What’s the difference between a floating bar and an announcement bar?
In everyday use, they’re the same thing. Plugin makers simply use different names for a bar that stays at the top or bottom of the page. What sets a buy now bar apart is its job, since it’s built around a purchase-focused button.
Is there a free plugin for a buy now floating bar WordPress sites can use?
Yes. Easy Notification Bar is completely free, and WPFront Notification Bar, HashBar and Sticky Buttons have free versions. For product pages, look for free WooCommerce sticky add-to-cart plugins in the official repository.
Can I hide the floating button on certain pages or on mobile?
Yes. Most plugins have display rules for pages and devices, and Elementor Pro lets you choose the devices with Sticky On. With the code method, you can target a page’s body class, like .page-id-25, or wrap the CSS in a media query to hide or move the button on smaller screens.
Is a Floating Buy Bar Worth Adding?
In many cases, yes, as long as you set it up with care. When it’s done right, a buy now floating bar WordPress stores use keeps the buy button close at the exact moment a shopper decides. Run the checks first, pick the tool and method that suit you, keep the bar light and readable, and let real data from your store guide the final design.
Read More: https://linkneon.com/how-to-protect-wordpress-files/
Final Thoughts: Is a Floating Buy Bar Worth It for Your Store?
In many cases, I’d say yes. Done well, a buy now floating bar WordPress setup keeps the buy button close right when a shopper is deciding. Just don’t rush it. Do the checks, pick a tool that fits and keep the bar light and easy to read. After that, let the numbers from your store have the final say.
If you’re not sure where to begin, start small. Add a simple bar to one of your best-selling product pages, give it a few weeks, and compare the numbers with how that page did before. A small test like this shows you what works for your shoppers before you change every page, and it’s easy to undo if the results don’t hold up.